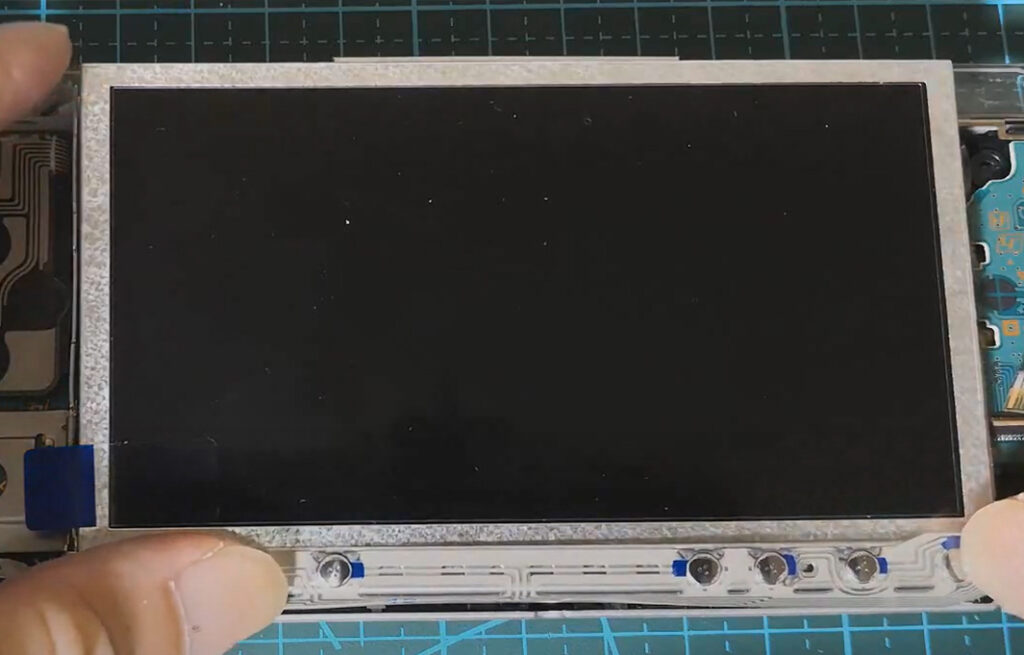
2, Remove your front shell case than remove all unnecessary such as buttons and rubber pad, then you can remove the original screen from the screen bracket.

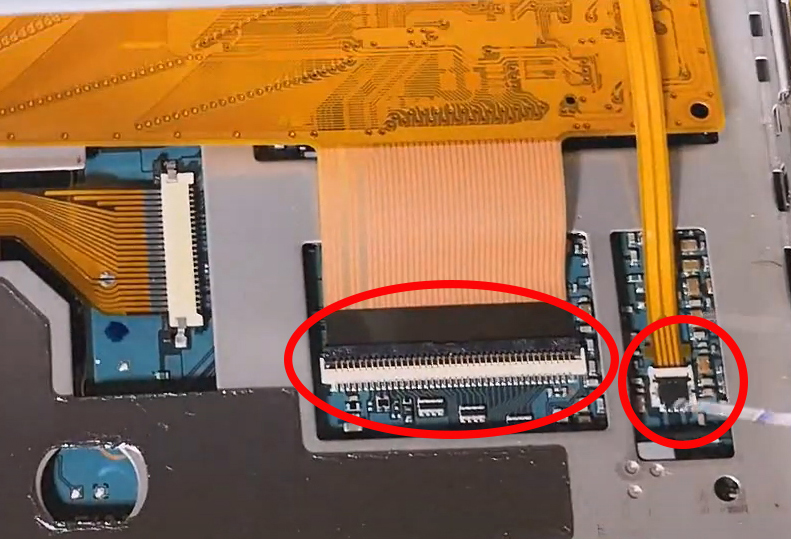
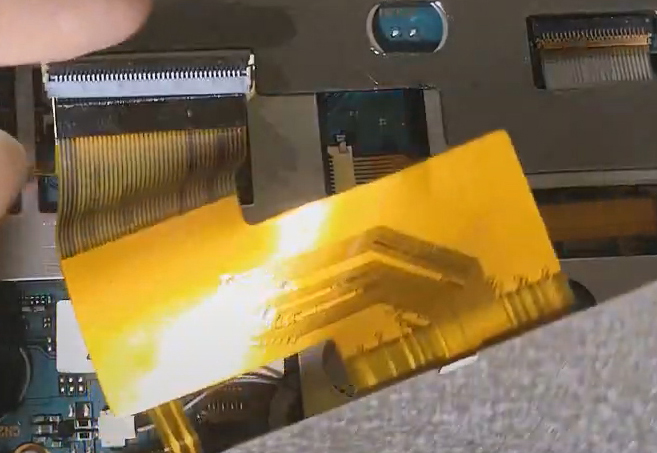
3, Remove the two flex cable show by the photos with red color circle from the connector, remove it with very gentle and be careful not to break the connector with slightly pull up the connector.
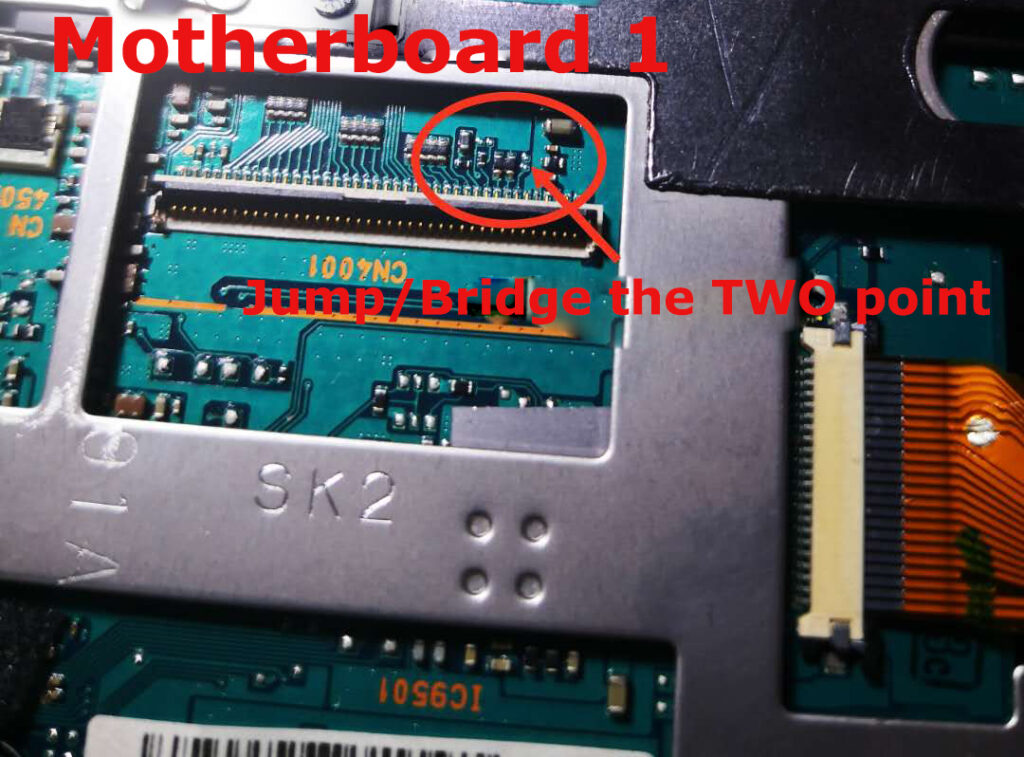
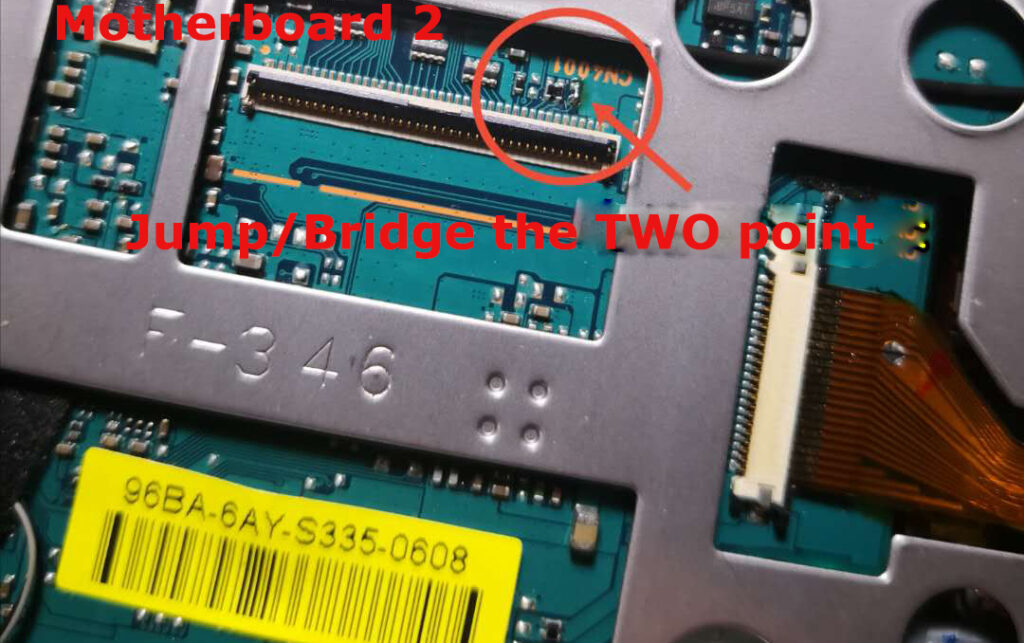
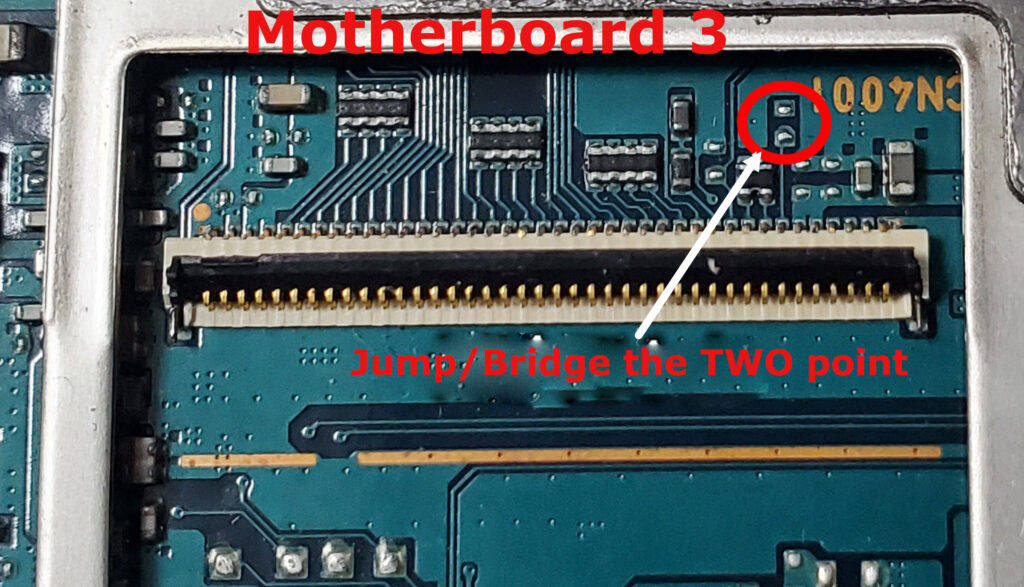
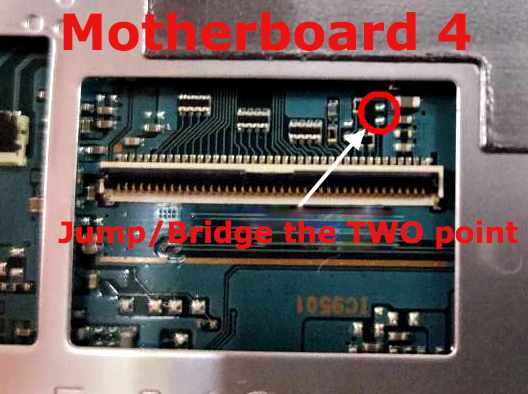
Once you done this steps now can move to next steps, located and find your soldering point, we need to jump and solder bridge two point by solder it together. Check below which is your PSP 1K logic board, total 4 different types of it.
4, Logic Board Types:
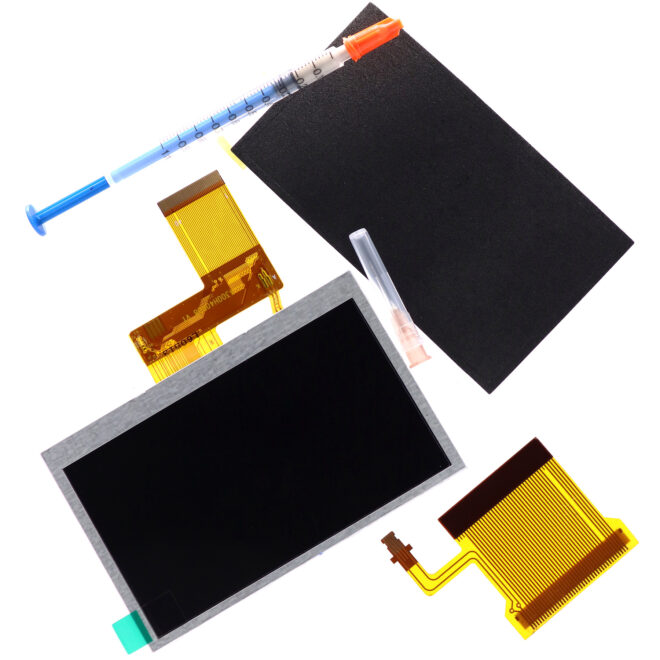
5, Once you done jump/bridge the two connection point now can move to next steps, connect the the flex cable that come with the set to the IPS Screen and the smaller size flex cable connect to the logic board small connector.

6, The larger size flex cable connect to the balance of the connector from the logic board.
7, Almost ready to finish your installation modification, now align and put the IPS screen with properly sitting and fix back of the components parts like buttons and front shell case. After you fix all now can put back all the screws and tighten it, once you done enjoy your reborn PSP with better resolution, color, brightness IPS Screen.